Dynamic deposit form
It is possible to allow users to deposit data from the website.
Depending on the result of a given field, other field(s) can be added to the deposit form.
A specific example is used here to explain the procedure:
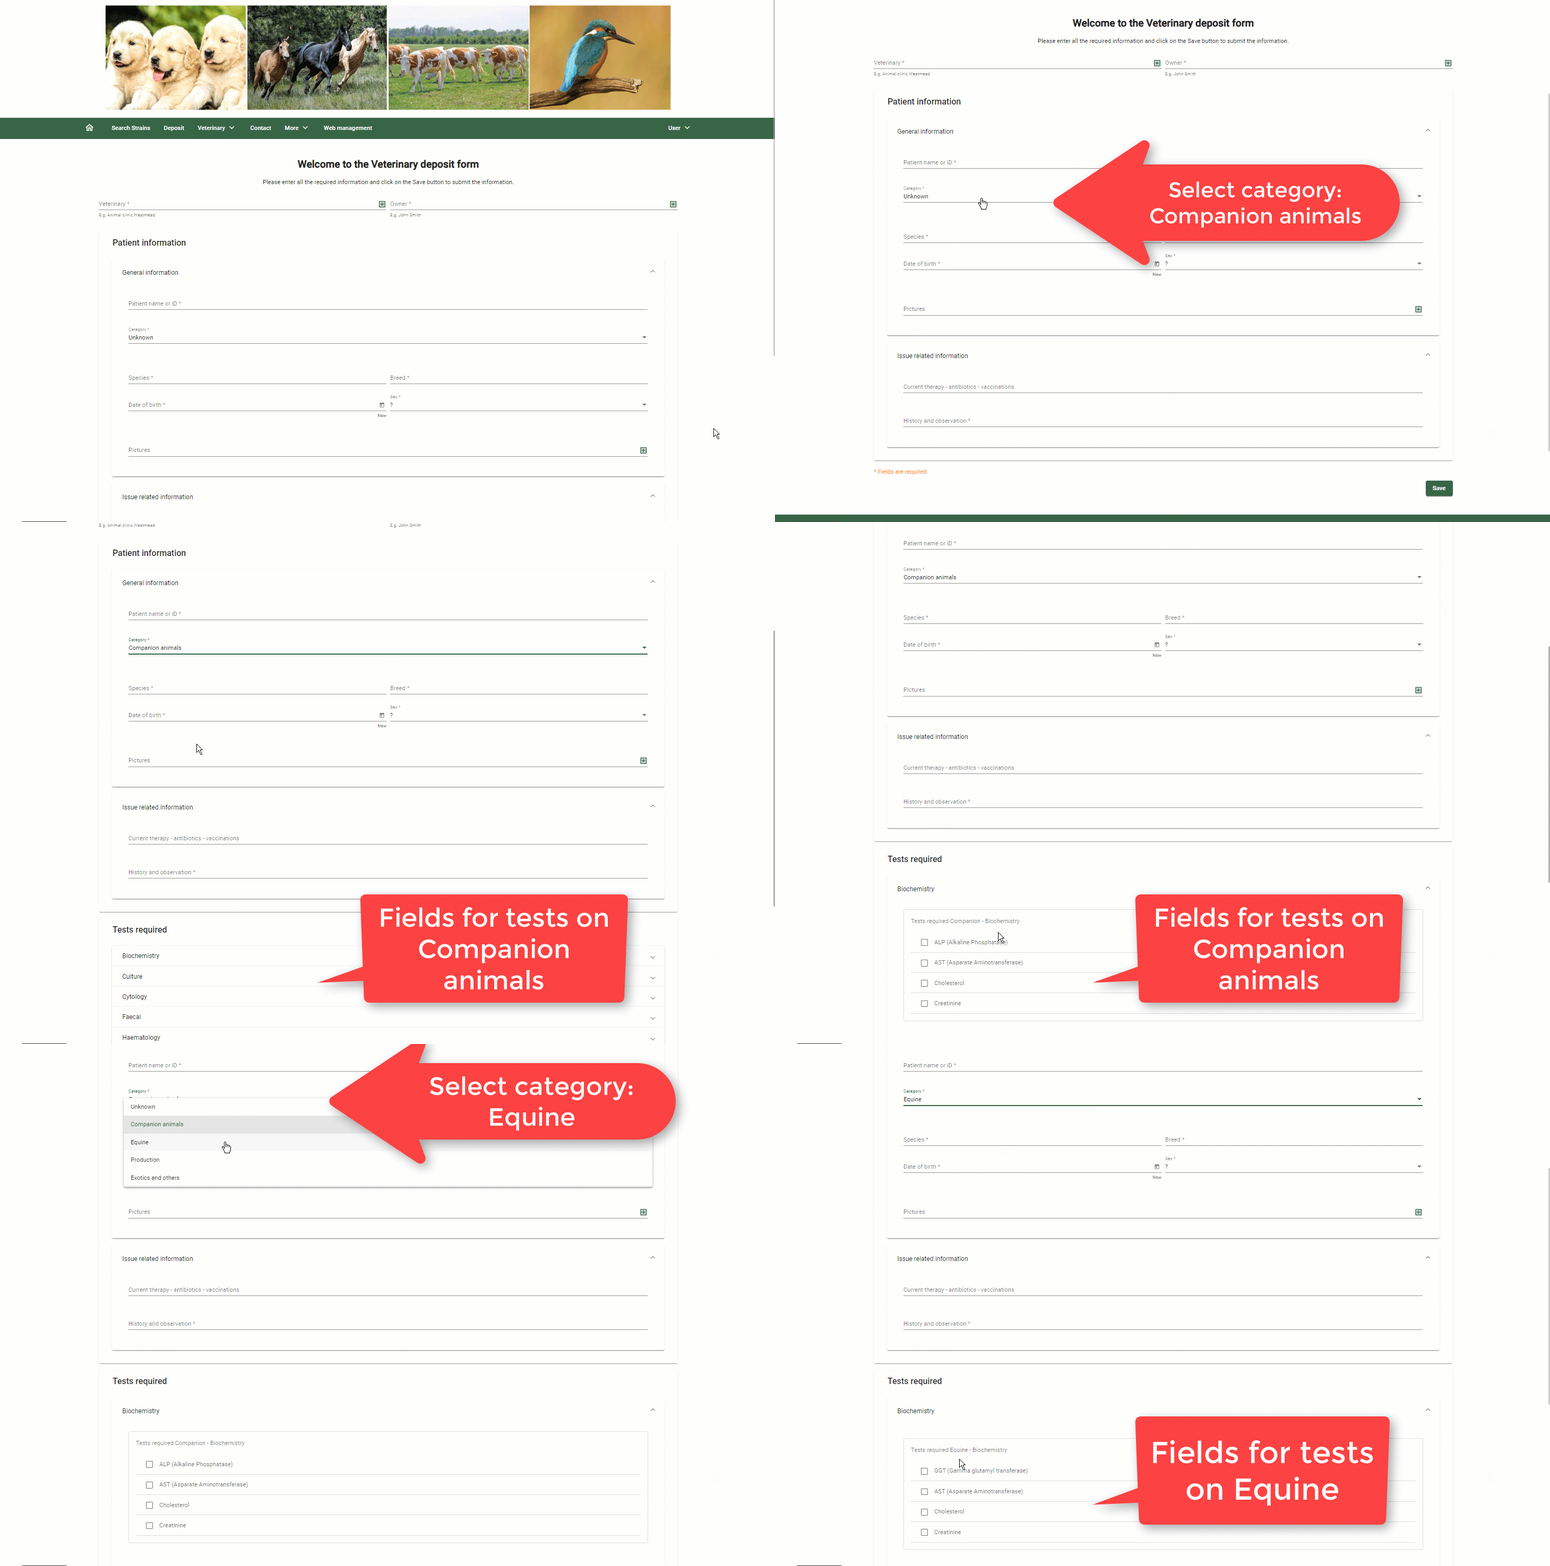
As shown in the gif-movie above, a dropdown field called "Category" is used to decide which extra fields should be added to the deposit form.
In short:
-
Build the needed System query templates. This is the dynamic field and it's possible options.
-
Create Form action templates for each System query template made. One if query result is true, and one if query result is false.
-
Create a Form template, or Stepper form template, and place the dynamic field to the form as well as all the fields that are present in the Form action templates.
-
Activate the trigger in the (stepper) form by selecting the system queries and matching form action templates.
-
Create a Page and drag the (stepper) form onto it. Link a web layout to the page.
-
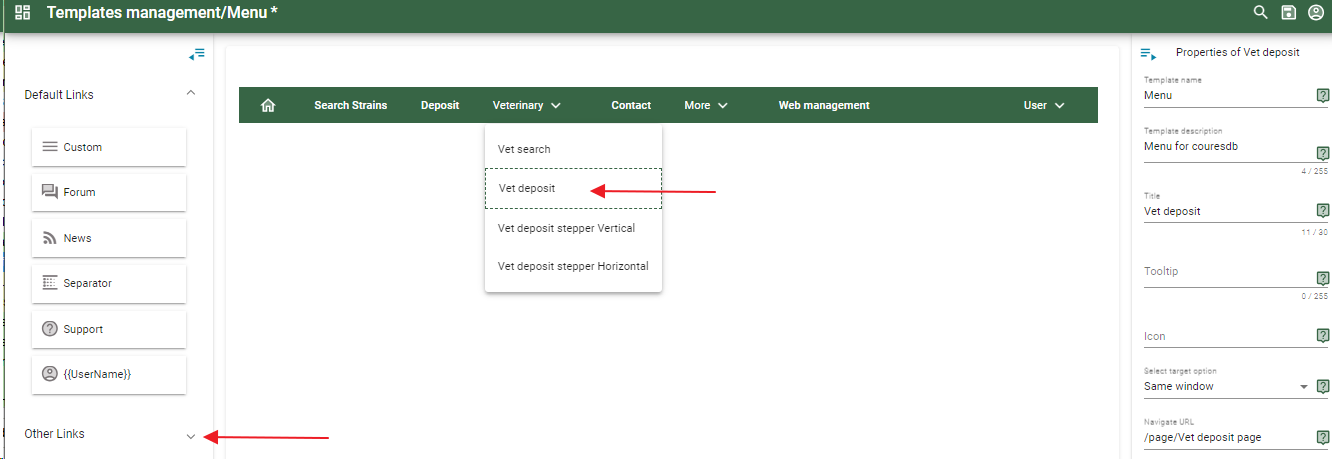
Optional: In the Menu, add a link to the dashboard page.
Full instruction:
-
Create a System query template and add the field(s) and the condition(s) that should be used as indicator to show another set of fields or not.
-
In this example the dropdown field "Category" is used as indicator.
-
This field has 4 options to choose from. Note that the option unknown is the default state.

-
For each of the 4 options a separate System query template needs to be created.
-
Drag the field "Category" to the System query and set the query for the wanted option.

-
For each system query template, the category is adapted.
-
System query Companion animals:

-
System query Equine:

-
System query Production animals:

-
System query Exotics and others:

-
Create Form action templates for each System query template made. One if query result is true, and one if query result is false.
The form action template contains the extra fields that should appear on the deposit form when the given Category is selected by the depositor.
-
For each of the 4 System query templates made (in step 1), two form action templates have to be created.
-
Form action Companional animals Yes.
-
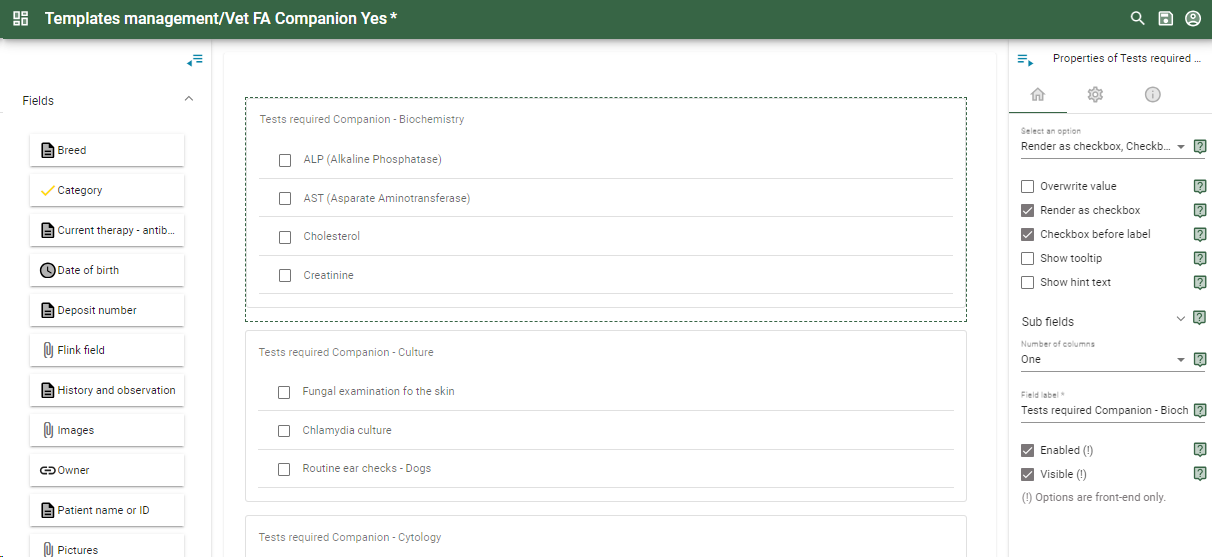
Drag the fields that should be displayed in the deposit form, when the user selects Companion animals.
-
In the properties of the form action Yes set (at least) the following details:
-
Select an option: Check Enabled (!) and Visible (!)

-
Enabled (!): check this option.
-
Visible (!): check this option.

-
Form action Companion animals No
A separate Form action template is needed for the No option.
The easiest way is to duplicate the Yes Form action, by clicking on the Duplicate icon in the Templates management.
-
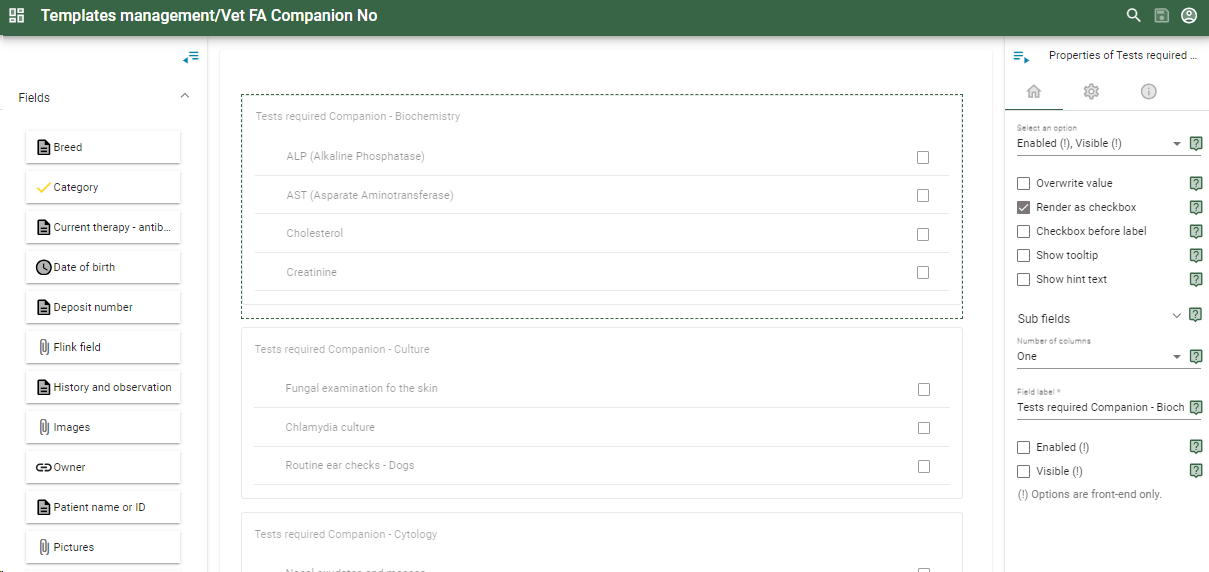
In the properties of the form action No set (at least) the following details:
-
Select an option: Check Enabled (!) and Visible (!)

-
Uncheck option Enabled (!). (This option should only be checked in the Form action Yes)
-
Uncheck option Visible (!). (This option should only be checked in the Form action Yes)

Repeat this step for each of the options in the (Equine, Production animals, Exotics and others).
In the end there are 8 Form action templates created.1. Form action Companion Yes2. Form action Companion No3. Form action Equine Yes4. Form action Equine No5. Form action Production Yes6. Form action Production No7. Form action Exotics Yes8. Form action Exotics No
-
Drag the wanted fields onto the form, including the dynamic field (here the dropdown field Category).
-
In the Properties - general options make sure that the following options are checked.

-
Also place all the fields that are present in the Form action templates.
-
For each field that is present in the form action but should not be shown by default in the form, in the Properties- general options check the Enabled (!) option, and uncheck the Bisible (!) option.

-
In the Properties of the (stepper) form, in the Trigger options, select the System queries and the matching Form action templates.

-
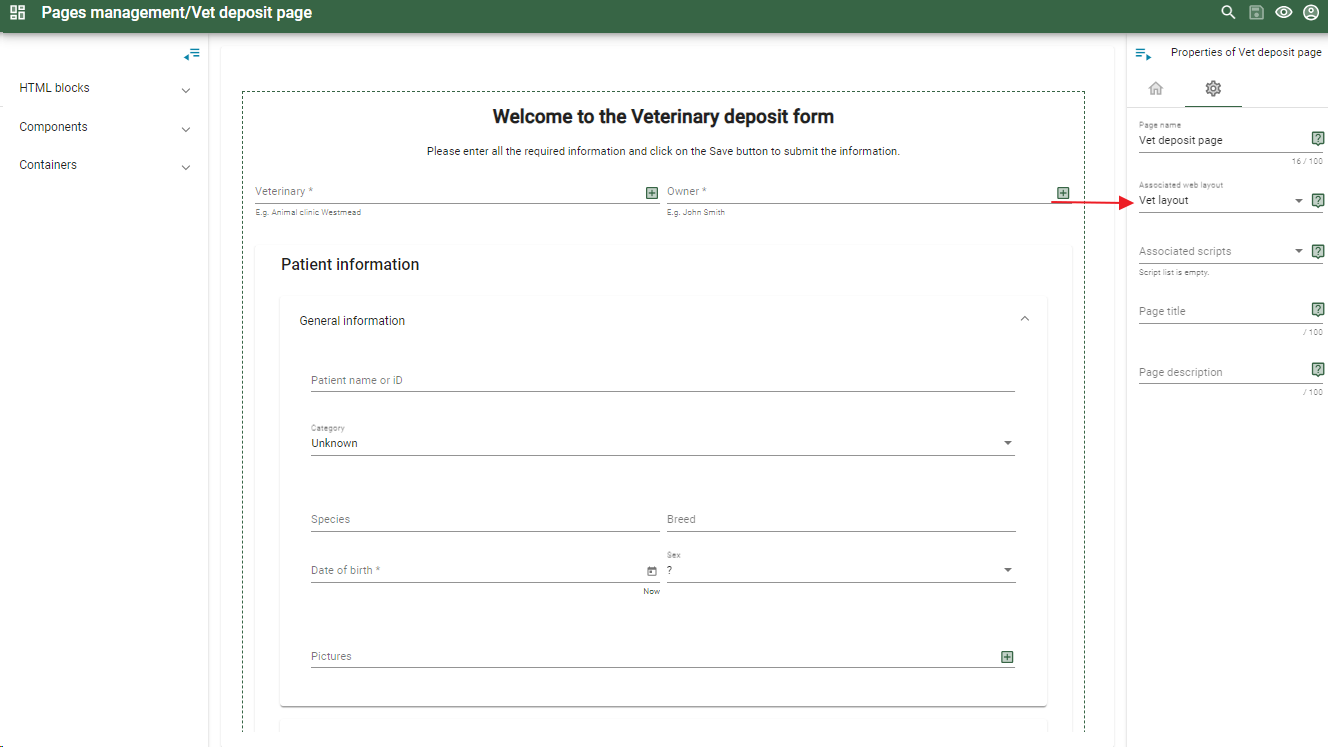
Create a Page and drag the (stepper) form onto it.
-
In the Properties - Global options, link a web layout to the page.
-


