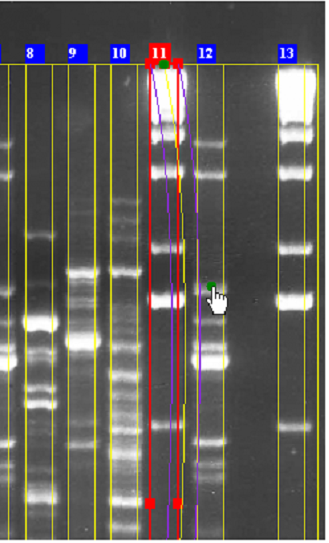
For obtaining the best results, make sure that the detected lanes are at the same place as the actual migration patterns (see picture below).
When a migration lane is not straight, press the Shift key and bend the lane using the mouse (drag either at the top, middle or bottom of the selected lane).
The position of each detected lane can be manually adapted. Right-click on a selected lane to change its properties.
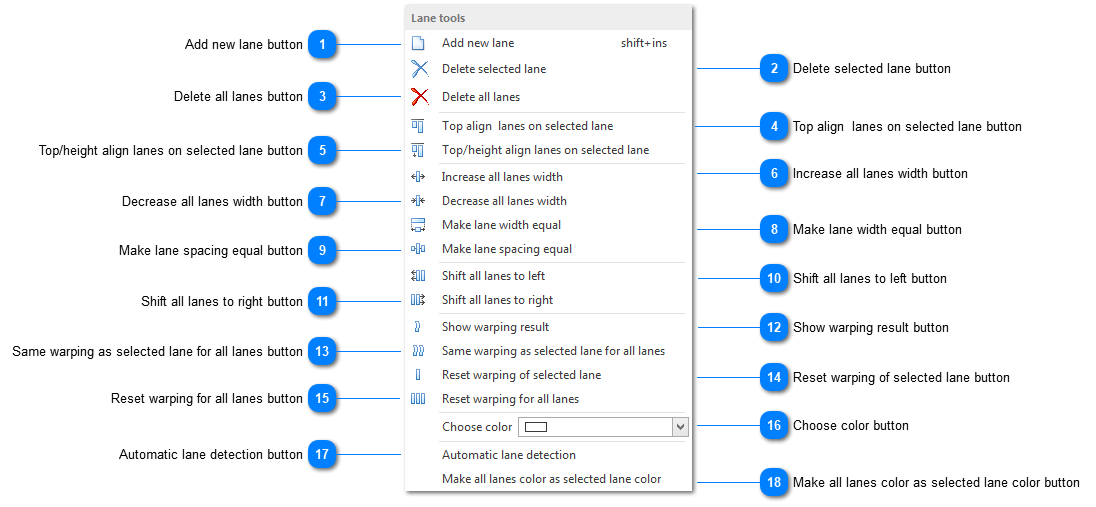
 Add new lane buttonAdd a new lane.
|
|
 Delete selected lane buttonDelete selected lane.
|
|
 Delete all lanes buttonDelete all lanes.
|
|
 Top align lanes on selected lane buttonAlign the top of all lanes to the level of the selected lane.
|
|
 Top/height align lanes on selected lane buttonAlign top and height of all lanes to the selected lane.
|
|
 Increase all lanes width buttonIncrease all lanes width by adding 5 pixels.
|
|
 Decrease all lanes width buttonDecrease all lanes width by removing 5 pixels.
|
|
 Make lane width equal buttonMake the width of all lanes equal.
|
|
 Make lane spacing equal buttonMake the lane spacing between all lanes equal.
|
|
 Shift all lanes to left buttonMove all lanes 5 pixels to left.
|
|
 Shift all lanes to right buttonMove all lanes 5 pixels to right.
|
|
 Show warping result buttonWarping results of selected lane will be shown in a panel on the right of the gel.
|
|
 Same warping as selected lane for all lanes buttonMake all lanes warping the same as the selected lane.
|
|
 Reset warping of selected lane buttonReset warping result of the selected lane.
|
|
 Reset warping for all lanes buttonReset warping for all lanes.
|
|
 Choose color buttonTo set the color of the lanes.
|
|
 Automatic lane detection buttonFind all lanes using the automatic lane detection method.
|
|
 Make all lanes color as selected lane color buttonAll lanes will get the same color as the current color of the selected lane.
|
|