OLink - Import data in an OLink field

There are two different ways to import for a link field:
-
Create a link to an existing record in the target table.
-
Create a new record in the target table and make the link.
-
Open the Import window. For instructions see Data import.
-
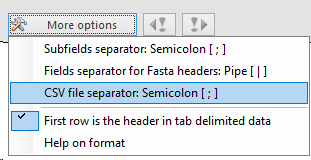
For scenario A (create a link to an existing record in the target table) we need to have the name (or id) of the mother table and the name (or id) from the target table.NameGeographic locations(Name field target table)BIO 14BelgiumNote that in this example the Locality table should have a record called Belgium.When importing based on the name of the record, it is possible to import 2 links for 1 record.Go to More options and select CSV file separator. Then use the separator that is selected in the import tool
 The default separator is Semicolon (;).NameName field target tableBIO 14Belgium;France
 -
For scenario B (Create a new record in the target table and make the link) we need to have the same as scenario A plus the ontology for the O field (and other information if preferred).NameGeographic locations(Name field target table)OntologyBIO 14BelgiumEuropeNote that in this example the Locality table should not have a record called Belgium.For practicing purposes, copy the following to clipboard:Name Geographic locations OntologyBIO 14 Belgium Europe
-
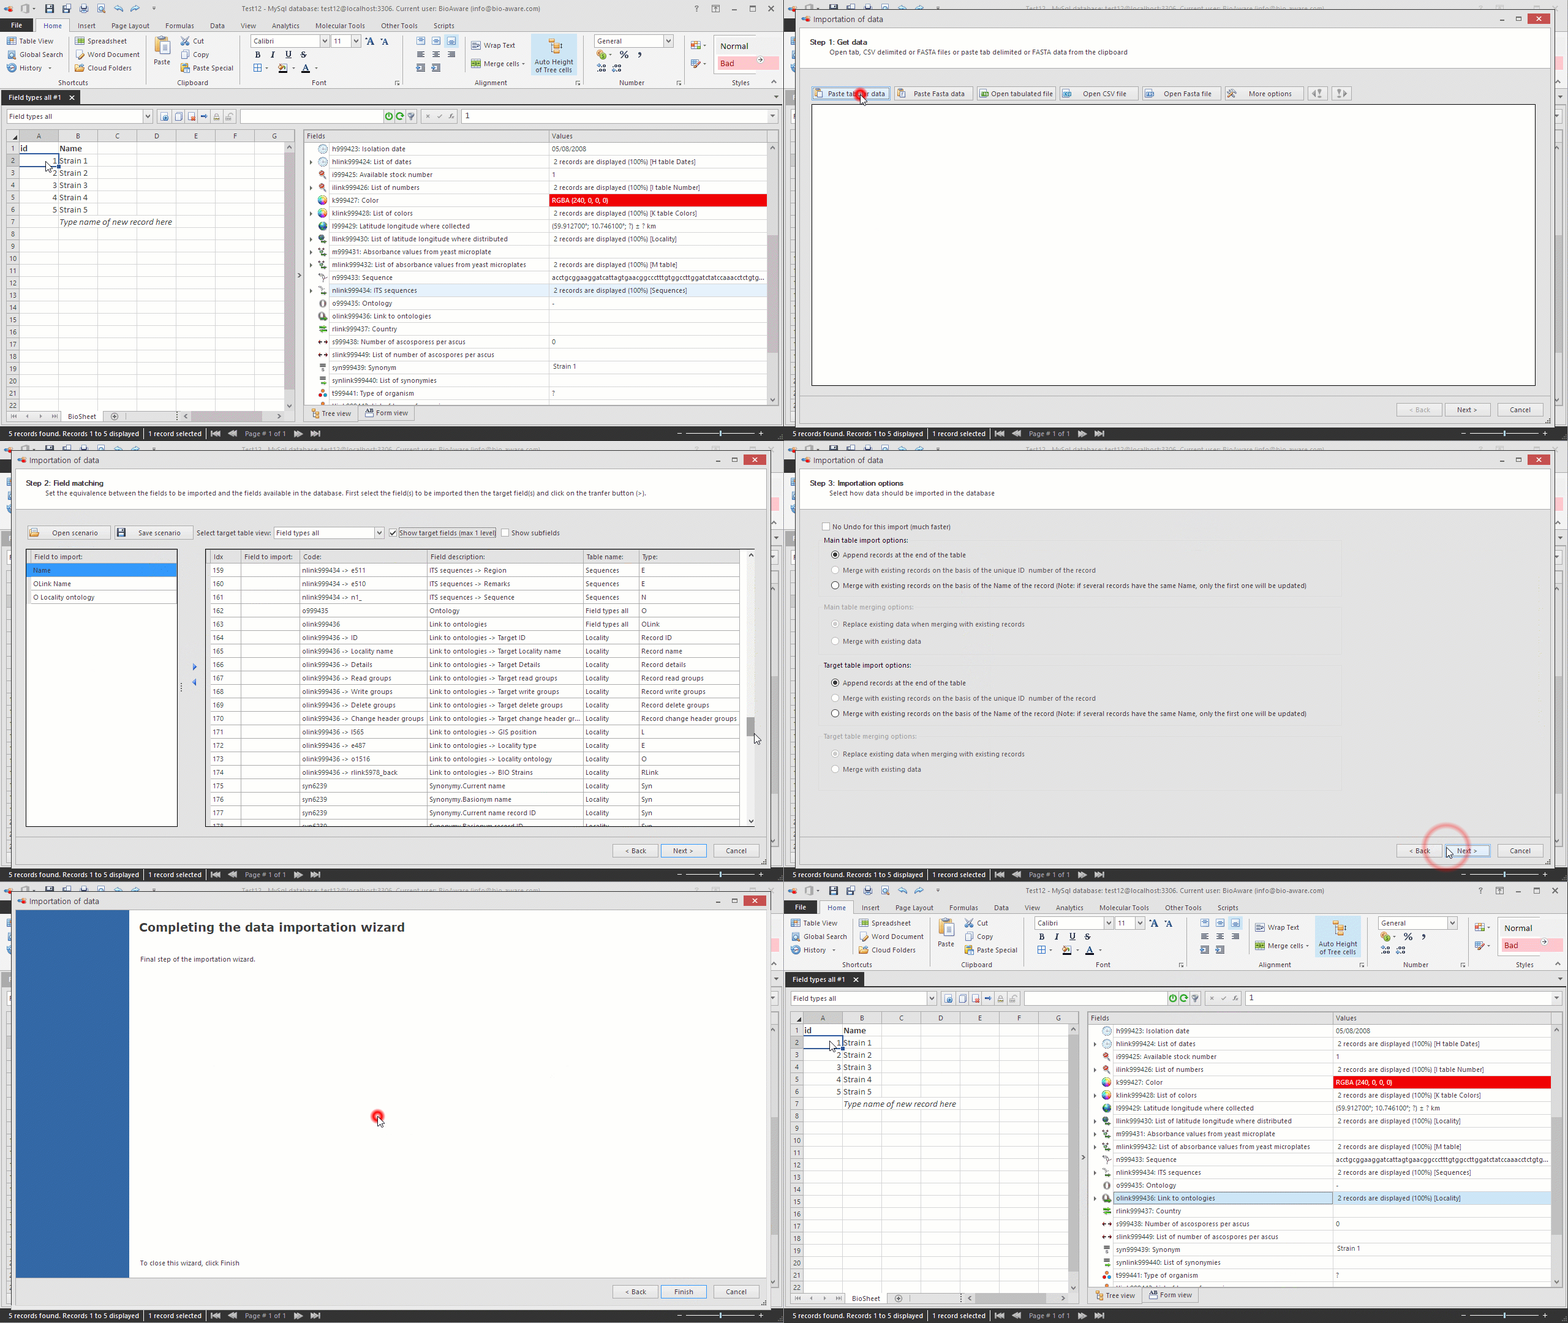
In BioloMICS in step 1 of the import wizard, click "Paste tabular data".
-
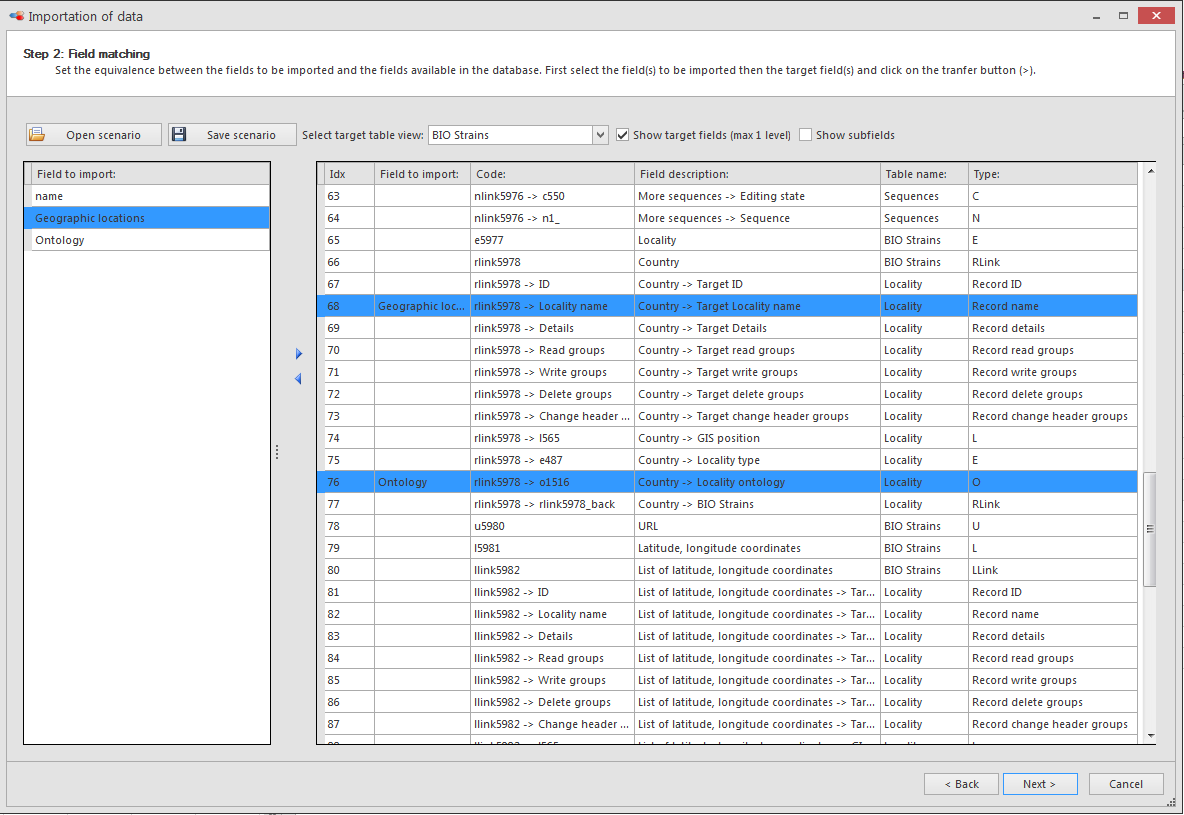
In step 2, check "Show target fields (max 1 level)" on the top-right to see all the fields of the target tables.
-
Link the fields to the corresponding field in the database.The Name field target table (Geographic locations) should be connected to the Record name of the target table (Locality).The Ontology should be connected to the O field in the target table (Locality).

-
In step 3, append or merge the data. For more information about merging data in an OLink field, click here.

