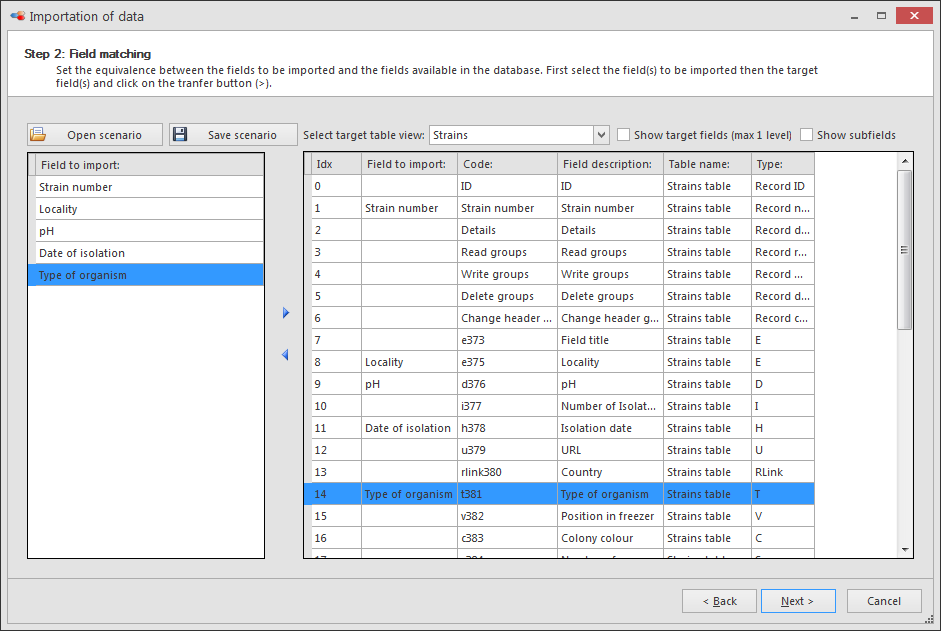
Step 2: link data
Set the equivalence between the fields to be imported and the fields available in the database.
-
Select a field from the left grid. This grid lists all the columns titles displayed in the grid in step 1.
-
Select the corresponding field in the right grid. This grid lists all available fields of the selected table view, including the record ID, the record name, the record details, etc.In some cases, the imported data does not correspond to a field but only to a subfield, mainly for A, C or M fields.In that case, check the top right box Show subfields, and all subfields will appear in the list.Note that only fields visible in the table view given in the top dropdown list are displayed. By default, the current table view used in the main BioloMICS dialog is selected.
-
Click on the arrow buttons in between the two grids, to add
 or remove
  the equivalency.
 -
Repeat step 1 to 3 for each of the fields in the left grid.Note that if one field from the left grid is not linked to a field in the right grid, then this data will not be imported.
-
Click Save scenario to save the current equivalencies.Click Open scenario to open a previously saved scenario. This option will only work when the exact same fields (and order of the fields) are used.
-
Click Next to go to the next step.