Major axis minor axis (step 3)
Two values will be retained per object and one must first retrieve the length (major axis) then the width (minor axis), for each object, sequentially.
-
To add a Major axis to an object, select the object.
-
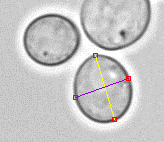
Press the Control key, click on the 'bottom' edge of the object and drag the mouse to the 'top' edge of the object.The major axis will be highlighted in yellow color.It is possible to resize or move the axis by dragging it to the right place.
-
Add the Minor axis of the same object using the same method then the one used for the major axis.The minor axis will be highlighted in purple color.It is possible to resize or move the axis by dragging it to the right place.

-
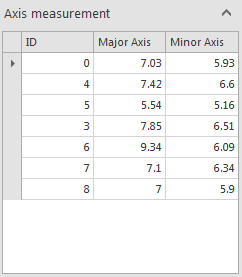
Results of measurements are displayed in the Axis measurements grid.
 To delete an axis, select it from the grid or directly from the picture and press on the Delete key.A deleted axis can be replaced by highlighting the cell to be measured from the grid. Then start measuring using the same method as described above.Content of values present in the grid can be copied to the clipboard. Highlight the wanted values and press Ctrl + C.
 -
Click Next to go to the next step.

